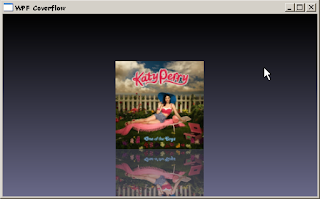
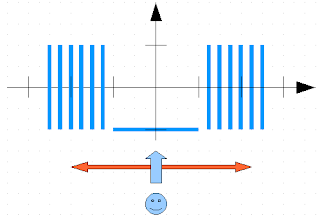
In order to display a reflection mirror, we add another GeometryModel3D to our Model3DGroup. This new element will be based on these points :
using Point2D = System.Windows.Point;We define the Point2D alias because of the conflict with System.Drawing.Point.
private Geometry3D TessellateMirror()
{
var p0 = new Point3D(-1, -3, 0);
var p1 = new Point3D(1, -3, 0);
var p2 = new Point3D(1, -1, 0);
var p3 = new Point3D(-1, -1, 0);
var q0 = new Point2D(0, 1);
var q1 = new Point2D(1, 1);
var q2 = new Point2D(1, 0);
var q3 = new Point2D(0, 0);
return BuildMesh(p0, p1, p2, p3, q0, q1, q2, q3);
}
For the texture, we use a VisualBrush object and we apply a LinearGradientBrush to the image OpacityMask :
using MediaColor = System.Windows.Media.Color;
private Material LoadImageMirror(ImageSource imSrc)
{
   var image = new System.Windows.Controls.Image();
   image.Source = imSrc;
   MediaColor startColor = MediaColor.FromArgb(127, 255, 255, 255);
   MediaColor endColor = MediaColor.FromArgb(127, 255, 255, 255);
   image.OpacityMask = new LinearGradientBrush(startColor, endColor, 90.0);
   var brush = new VisualBrush(image);
   return new DiffuseMaterial(brush);
}
 There are two possibilities to browse the covers :
- Keep the camera at the very same place and translate/rotate all covers as we are browsing.
- Transform only a few covers (e.g. the one currently selected) and move the camera.
 The current cover will be put in front. The other covers will be rotated and placed on each side of the current cover. When the camera will move, the current cover will be moved back with the unselected ones, and the newly selected cover will be put in front.
There are two transformations : a rotation and a translation on X and Z axes. The rotation angle will be 90, 0 or -90 degrees. The Z translation will be 0 or 1 for the current cover. The X translation will be 0 for the current cover, or proportional to the distance from the origin. For each cover, we will save its position. We will compare the cover position with the current index to compute the transformation parameters. This gives us :
private readonly int pos;Applying the transformations to our Model3DGroup is easy. We create the transformation in the constructor with a default index of 0 :
private double RotationAngle(int index)
{
return Math.Sign(pos - index) * -90;
}
private double TranslationX(int index)
{
return pos * .2 + Math.Sign(pos - index) * 1.6;
}
private double TranslationZ(int index)
{
return pos == index ? 1 : 0;
}
private readonly AxisAngleRotation3D rotation;Then, we will call the Animate method the transform the cover :
private readonly TranslateTransform3D translation;
public Cover(string imagePath, int pos)
{
this.imagePath = imagePath;
this.pos = pos;
ImageSource imSrc = LoadImageSource();
modelGroup = new Model3DGroup();
modelGroup.Children.Add(new GeometryModel3D(Tessellate(), LoadImage(imSrc)));
modelGroup.Children.Add(new GeometryModel3D(TessellateMirror(), LoadImageMirror(imSrc)));
rotation = new AxisAngleRotation3D(new Vector3D(0, 1, 0), RotationAngle(0));
translation = new TranslateTransform3D(TranslationX(0), 0, TranslationZ(0));
var transformGroup = new Transform3DGroup();
transformGroup.Children.Add(new RotateTransform3D(rotation));
transformGroup.Children.Add(translation);
modelGroup.Transform = transformGroup;
Content = modelGroup;
}
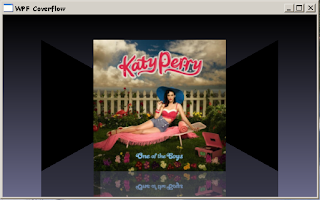
public void Animate(int index)If we create three covers, we realize that only one is visible :
{
rotation.Angle = RotationAngle(index);
translation.OffsetX = TranslationX(index);
translation.OffsetZ = TranslationZ(index);
}
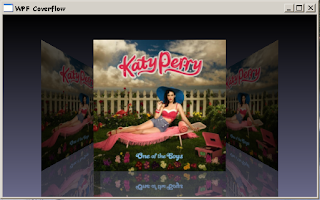
 We need to replace our single light source with two different ones :
<ModelVisual3D>
  <ModelVisual3D.Content>
    <DirectionalLight Color="White" Direction="1,0,-3" />
  </ModelVisual3D.Content>
</ModelVisual3D>
<ModelVisual3D>
  <ModelVisual3D.Content>
    <DirectionalLight Color="White" Direction="-1,0,-3" />
  </ModelVisual3D.Content>
</ModelVisual3D>
 Continue with Part 3.
Edit 2014-02-23 : Code has moved to github.
3 comments:
Hello there, i have a question on this part of the tutorial: is there a way to make the translation in X infinite? i.d if i reach to the last image and if i keep moving i want to return to the first cover and so on.
Thanks in advance =)
@Jennifer You can try to put covers on a circle. Then the camera should be on another circle. If camera's circle is bigger, all covers would be visible on the screen (slow!). So I think the camera should be inside. This solution may work fine if you have lots of covers. HTH
thanks for your reply, is there anyway you can post an example of how to do it? thank you so much!!
Post a Comment